Fazer agulhas de Cerda de Javali

IMG_7204.jpg
 

Por altura da minha primeira visita, José Machado mostrou-me por alto uma técnica que achei interessante: fazer de raiz uma linha de cânhamo com duas pontas de cerda de javali, utilizada tradicionalmente para coser calçado ou outros artigos em pele.Para quem está habituado a associar costura a agulhas metálicas, a cerda de javali é novidade. A verdade é que é uma excelente agulha para usar num material rígido como o couro, por ser tão forte como flexível, o que a torna perfeita para fazer passagens a 90º, sem criar resistência com a pele.

When I first visited him, José Machado showed me the basics of a technique I found interesting: making a hemp sewing thread from scratch with two boar bristles tips traditionaly used to sew shoes or other leather goods. For someone used to associate sewing with metal needles, the boar bristle a novelty. Actually, it’s an excellent needle to use in a stiff material like leather, because it’s as hard as it is flexible, which makes it perfect for those 90º turns, without causing too much friction with the leather.


No vídeo, o Zé explica como se faz esta linha, passo-a-passo.

MATERIAIS E FERRAMENTAS:
- fio de cânhamo 
- cera de abelha misturada com pez 
- duas cerdas de javali 
- sovela

PASSO-A-PASSO:

1. Desfiar o primeiro fio
Para que as cerdas possam ser atadas à linha sem criarem nós que as impeçam de passar pelo furo, cada fio deve ser desfiado de forma a que, nas pontas, não reste mais que uma única fibra de cânhamo. Para fazer isto, o fio é raspado continuamente entre a palma da mão e a perna. As fibras que se quebram são desfiadas.

2. Adicionar os restantes fios 
A resistência da linha depende do número de fios que possui. Neste caso, a linha terá 4 fios que serão adicionados um a um, sendo que cada um é desfiado em cada vez, para que a ponta da linha se vá sempre mantendo afiada e com uma fibra única na ponta. Para assegurar isto, cada fio é colocado com cerca de menos 5cm que o anterior, em ambas as pontas, para que a espessura da linha aumente da ponta para o interior.

3. Torcer a linha 
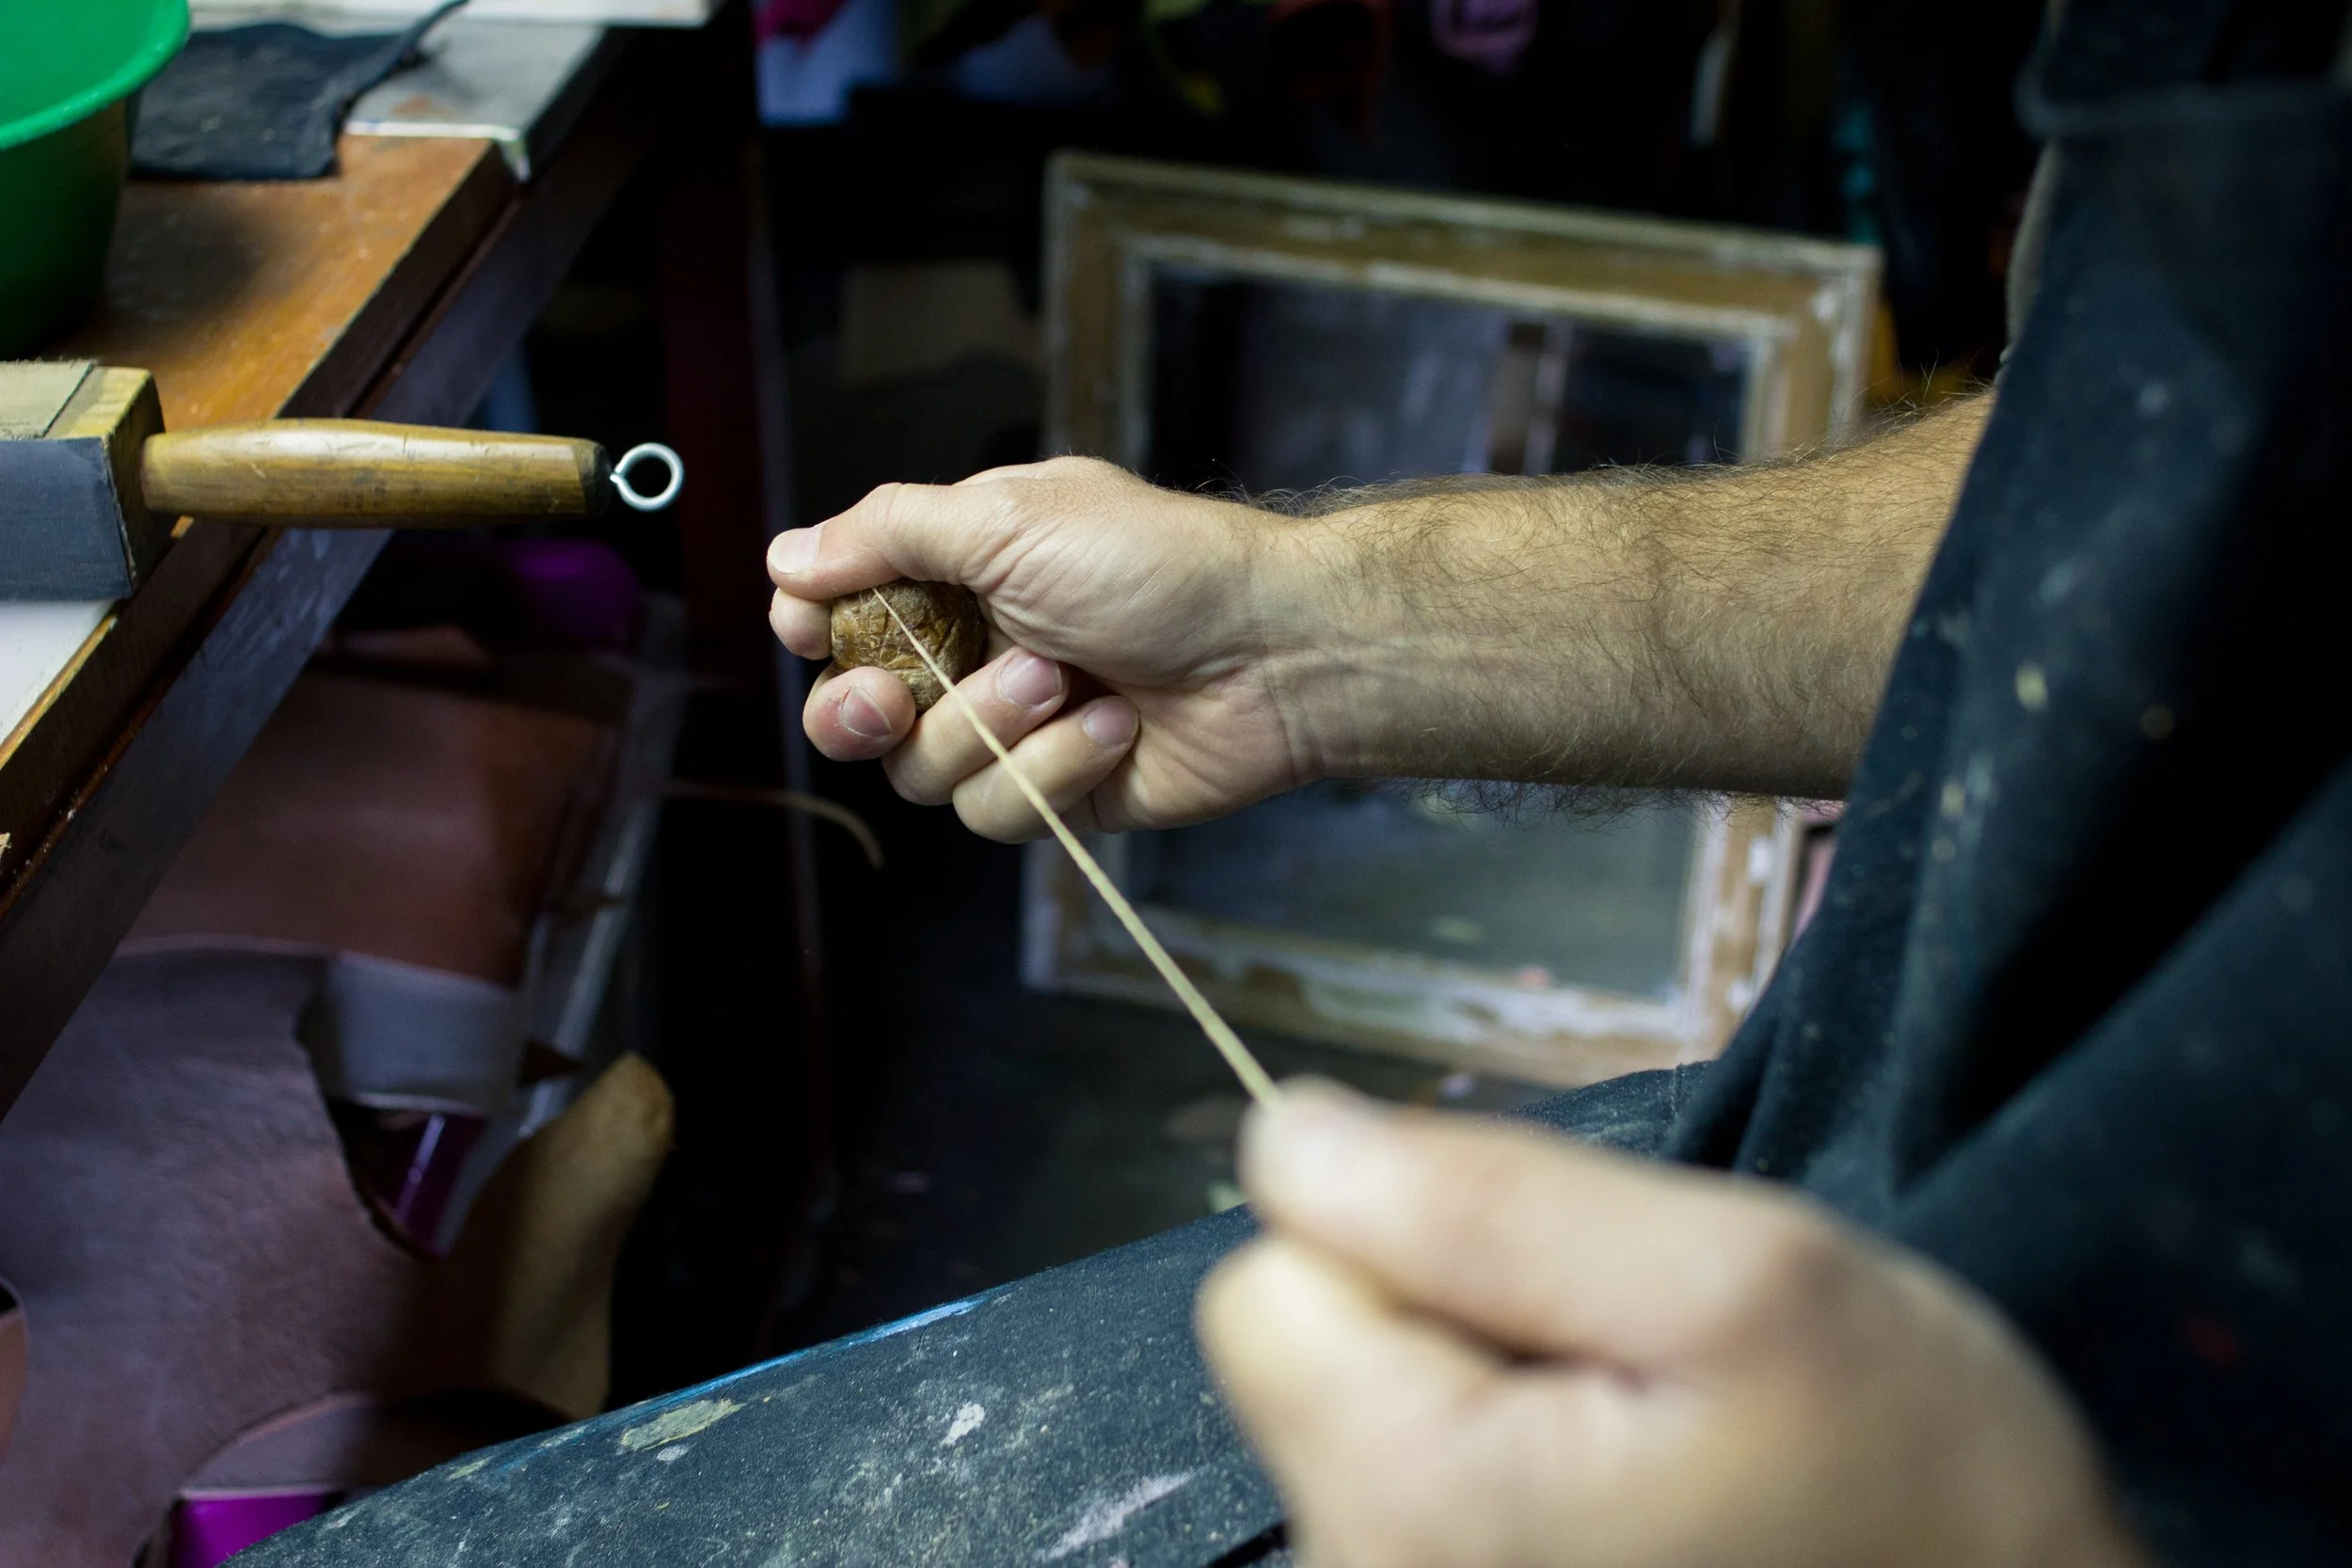
Adicionados os 4 fios que vão formar a linha, torna-se necessário torcê-los para que lhe dêem a devida resistência. Para isto, começando por uma das pontas a linha é enrolada no polegar e, ao terminar, é novamente desenrolada. Este movimento vai criar um efeito de espiral que vai dar torção ao conjunto dos 4 fios e, neste caso, deve ser repetido um mínimo de 6 vezes.

4. Finalizar a ponta 
Estando a linha torcida, falta finalizar as duas pontas para que estas não se comecem a desenrolar. Repetindo o movimento de esfregar o fio entre a palma da mão e a perna, a ponta da linha é esfregada uma vez no sentido contrário ao da torção, como se estivesse a ser desenrolada, e depois várias vezes no sentido da torção, enquanto é humedecida passando pela boca. Este passo de desenrolar pode parecer contrário ao que se pretende, mas é este movimento que confere à ponta mais força para se enrolar no sentido correcto. 

5. Encerar
 
Estando a linha completamente torcida, é agora encerada com uma mistura de cera de abelhas e pez. 

6. Prender as cerdas de javali
 
Pegando na fibra isolada que ficou na ponta da linha, começa-se a enrolá-la a partir da raiz da cerda até cerca de 2cm – a raiz da cerda de javali irá funcionar como ponta da agulha. Depois esta será enrolada para trás (em direcção à raiz) e, por fim, novamente para a frente, mas bem junta, de forma a que quase não se veja a cerda sob o fio. Finalizando a fase de enrolar o fio na cerda, com a ajuda da sovela faz-se um furo mais ou menos a meio por onde passará a raiz da cerda de javali, dando um pequeno nó que prende a cerda.

A linha de cânhamo, com uma cerda de javali em cada ponta, está assim preparada para começar a coser.

In the video, Zé explains how this thread is done, step-by-step. 

MATERIALS AND TOOLS: 
- hemp thread 
- beeswax mixed with pitch
- two boar bristles
- awl

STEP BY STEP

1. Fraying the first strand 
To allow the bristles to be tied to the thread without forming knots that prevent them from going into the hole, each thread must be frayed so that, at the end, there is no more than a single hemp fiber. To do so, the thread is scraped off continually between the palm and the leg. The fibres that break off are frayed.

2. Adding the remaining strands 
The endurance of the sewing thread depends on how many strands it has. In this case, the sewing thread will have 4 strands that will be added one by one, each one of those being shredded every single time, so that the end of the sewing thread stays sharp and with a single fibre on its tip. To make sure of it, each strand is placed 5 cm shorter on each end, so that the thickness of the thread will increase from the tip inward.

3. Plying the thread 
After adding the 4 strands that will form the sewing thread, you have to twist them so that they become strong enough. To do so, you start by one of the ends and wind the sewing thread on your thumb and, when you finish, you unwind it. This motion will create a spiral effect that will ply the 4 strands, and, in this case, should be repeated at least 6 times.

4. Finishing the end 
When the sewing thread is plyed, it is necessary to finish the two ends so that they will not start to unwind. By repeating that motion of twisting the thread between the palm and the leg, the end of the thread is rolled once anti-torsion-wise, as if it is being unwind, and then several times torsion-wise, using saliva to keep it damp. This unwinding procedure may seem contrary to our intentions, but it is this motion that gives the thread tip more strength so that it will remain winded in the right direction.

5. Waxing 
When the sewing thread is completely plied, we now wax it with a mixture of beeswax and pitch.

6. Attaching the boar bristles 
Picking the single fibre that was left on the end of the thread, we start to wind it from the root of the bristle up to circa 2 cm - the root of the bristle will work as the tip of the needle. Then it will be winded back (towards the root) and, lastly, winded to the front again, but tightly, so that you almost cannot see the bristle under the thread. Finishing this stage of winding the thread onto the bristle, you use the awl to punch a hole just about in the middle of where the root of the boar bristle will go, tying a small knot that secures the bristle.

(English translation by Nuno Miranda Ribeiro)


Anterior
Anterior

Cestos de Portugal

Próximo
Próximo

Mulheres de Bucos